Upgrade NSX-V 6.2.8 to 6.4.x Unicast in a vCloud Director environment
When planning an upgrade of NSX in a vCloud Director environment, it isn’t always straight forward. For those who hasn’t used vCloud Director before, it is a solution by VMware to allow true multi-tenancy for Cloud Service Providers (CSP). It integrates and abstracts underlying resources with vCenter and NSX and all activities are done directly within vCloud Director UI. e.g. Creating VMs, attaching to a network, etc.
Key Changes
- From NSX-V 6.3.0 release onwards, the way NSX communicates with ESXi, ESG’s & DLR’s changes from VIX to Message Bus.
- Post 6.2.x of NSX consolidates the VIBS into one package which manages VXLAN – DFW and VSIP, VDPI. VDPI (vShield-Protocol-Introspection) is also removed in 6.3.x.
- Data Security is no longer supported in 6.3.x and later versions. This needs to be uninstalled before proceeding to upgrade.
Taking us From:
[root@esx002:~] esxcli software vib list | grep esx-v
esx-vdpi 6.0.0-0.0.5747501 VMware VMwareCertified 2017-09-06
esx-vsip 6.0.0-0.0.5747501 VMware VMwareCertified 2017-09-06
esx-vxlan 6.0.0-0.0.5747501 VMware VMwareCertified 2017-09-06
To:
[root@esx002:~] esxcli software vib list | grep nsx
esx-nsxv 6.0.0-0.0.7563456 VMware VMwareCertified 2018-05-22
Assumptions
Most platforms following VMware Validate Designs (VVD) will have the following:
Management: Separate vCenter with it’s own ESXi cluster and a NSX Manager bound to it. Management cluster typically has no NSX controllers deployed as VXLAN isn’t usually utilised here.
Client/Workload: This will be again a separate vCenter with it’s own NSX Manager, 3 NSX Controllers and separate ESXi hosts to management domain.
Both of these vCenters are bonded to a pair of PSCs (HA) in linked-mode. So authentication and control can be from SSO off PSC.
These upgrade steps are based on above design.
NSX Upgrade Pre-Checks
- Check the release notes of the version of NSX you are trying to target. It addresses issues resolved and current known bugs. It is usually helps make a decision on target version. https://docs.vmware.com/en/VMware-NSX-Data-Center-for-vSphere/index.html
- Verify your ESXi, vCenter and vCloud Director versions are compatible with the target NSX version. https://partnerweb.vmware.com/comp_guide2/sim/interop_matrix.php#interop&93=&2=&1=
- If you have guest introspection or network extensibility partner services integrated with NSX, ensure they are also compatible with target NSX version. http://www.vmware.com/resources/compatibility/search.php?deviceCategory=security
- If you have ESXi 6.0 U3 or earlier, VMware Update Manager (VUM) can be often unreliable during upgrades. So suggestion is to tell NSX to contact EAM to push the new VIBs to ESXi hosts. In order to do this, login to the vCenter MOB and update “bypassVumEnabled” flag to “true”. http://kb.vmware.com/kb/2053782
- NSX Backups – Too many backup files in backup folder may result in poor performance. Either move out old backup files or remove them from target server. This could be your SFTP/TFTP. Upgrade wizard will complain otherwise.
- In a vCloud Director environment, make sure you have arranged downtime for the management plane. You will need to go in to Provider VDCs section and disable all of the PvDCs that are bonded to this NSX environment which you are trying to upgrade. Otherwise, your users/customers might be trying to create new VXLAN virtual wires after you have taken backups or whilst upgrade is taking place and task end up failing to complete.
- Ensure forward and reverse DNS lookup is working for all vSphere components.
- Check that the clusters which are prepared for VXLAN has green tick against all hosts.
- If you have edges (ESGs), make sure they have been redeployed to match current version of NSX.
- Login to NSX Manager and check the file system isn’t over 70%.
- Login to NSX Manager Appliance and verify the lookup service is connected. Last synchronisation with vCenter is most recent (it only updates when some objects are updated in vCD or vCenter).
- For more detailed pre-check: https://docs.vmware.com/en/VMware-NSX-Data-Center-for-vSphere/6.4/com.vmware.nsx.upgrade.doc/GUID-5738E14C-EBAD-4AEF-9E42-A78FB146CE36.html
Upgrading NSX
- Ensure vCloud Director PvDCs are disabled for client clusters. It wouldn’t hurt to check active jobs on each vCloud cells and give them to complete or quiesce them.
- Within vSphere Web client, take a backup of VXLAN Distributed switch. ( Client vCenter only. This can come in handy if something horribly goes wrong and you need to restore connectivity to VMs ).
- Take a backup of both NSX Managers to remote TFTP/SFTP and confirm back up is in place on the remote server.
- Take a support log bundle from both NSX managers and vCenters ( Can be helpful to VMware GSS if upgrade fails ).
- Take a clone of both NSX Managers ( Snapshots are not supported )
Part 1 – Management Domain
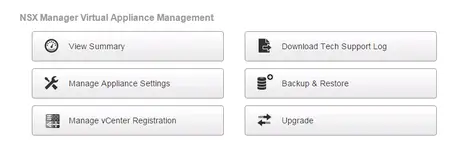
- Within Management NSX Manager Appliance UI, click on upgrade.
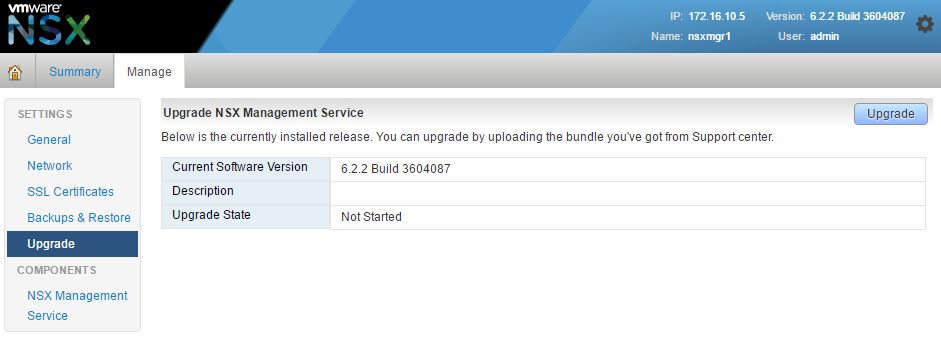
- Click on upgrade button again on top right hand corner
- Choose the bundle from your local drive. You can get the file from VMware download section.
- Wait for the upload to complete, this could take a few minutes.
- Once upload has completed, it will prompt with an option to select SSH and CEIP. Enable SSH and disable CEIP if you don’t want to participate in customer improvement program. Once source and target versions are confirmed in the prompt, click on upgrade.
- Whilst the upgrade is running, you can SSH to NSX Manager and execute
show log manager followto see verbose output. - Once the upgrade of Management NSX manager has completed, click on the summary page to see confirm the upgrade version number. It may take up to 10 minutes after upgrade has completed for NSX Manager UI to be fully functional whilst bunch of services start up.
- Verification: Go to vCenter Web Client -> Networking and Security -> Installation -> Host Preparation tab. Select management NSX manager from the drop down and see if EAM status is up.
- You should see an “upgrade available” option against the management cluster. Even if VXLAN is not installed, it is recommended to click on upgrade, so any ESGs deployed will get the latest NSX base code and vCenter MOB is updated with relevant schema. This upgrade action will push new VIBs as mentioned at start of this article to the ESXi hosts.
- Monitor the activities in vCenter against the management hosts. Once they are finished, host summary section will say “reboot required”.
- Perform rolling reboot in the management cluster until the host preparation status within NSX Manager is green again.
- Finally, if you have a ESG/Edge in management domain, you can redeploy this to latest version of NSX. This marks management platform NSX upgrade as complete.
Part 2 – Client/Workload Domain
- Time to login to client NSX Manager appliance and perform the upload process again. Hit upgrade once bundle has been uploaded.
- Once client NSX Manager has upgraded, go to vCenter Web Client -> Networking and Security -> Installation and upgrade. Select client NSX manager from the drop down menu. See if the controllers are all connected and green.
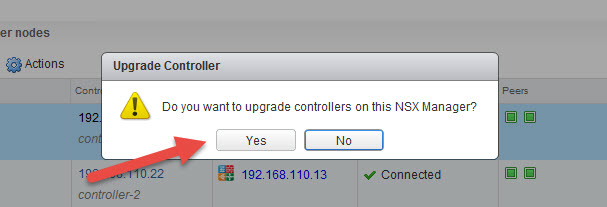
- Go to “Controller Cluster Status” column and click on the “upgrade available” link.
- Click “Yes” on the upgrade controller prompt.
- Again, another prompt will appear. Click on “proceed” to continue.
- During the upgrade, status of the controllers will be up and down in certain sequence. Do not be alarmed. Upgrade process removes one of the controllers completely and redeploys then renames it. On a decent sized environment, it could take about 15 minutes per controller. This is due to underlying storage, infrastructure and overall process.
- Once all the controllers are back in connected state, check the “software version” column to see if it has latest base code. This version doesn’t always correlate with NSX Manager build number.
- Once client NSX Manager and controllers has been upgraded, go to vCenter Web Client -> Networking and Security -> Installation and upgrade -> Host Preparation tab. Select client NSX manager from the drop down and see if EAM status is up.
- Click on “upgrade available” against each client cluster to push latest NSX VIBs to ESXi hosts.
- Monitor the progress in vCenter tasks window. Allow 5-10 minutes for the installation to complete.
- Perform a rolling reboot of all the hosts in the client cluster until the host preparation comes back as green.
- Verification: Check there are no errors on NSX dashboard following the upgrade.
Part 3 – Post upgrade tasks
- Re-enable PvDCs within vCloud Director
- Perform some baseline testing by creating VMs, redeploying edges/ESGs, etc to ensure communication is back to normal. Also see if edges redeployed are on latest base code.
- If you are satisfied with the upgrade, you can now get rid of the clones.
Regression
If you have upgraded the ESXi hosts with latest version of NSX VIBs, it’s really messy to revert back to original version. So at this point, is best to engage VMware support to troubleshoot the issue you are experiencing.
I have downgraded a fully upgraded NSX environment back to it’s original version, but it required some reverse engineering. I would NOT recommend it. Below steps are just to give an idea and it is very disruptive and should not be tried without VMware’s involvement.
- Power down the active NSX Managers, starting with management.
- Bring up the clone management NSX Manager.
- Bring up the clone client NSX Manager.
- Redeploy the controllers.
- Login to vCenter MOB and update the NSX VIB URL to older version.
- Drag a host out of the cluster, so it removes NSX VIBs. Reboot it, then once it’s up in vCenter again, drag it back in. At this point, EAM will look at MOB and it will see old NSX VIB path and push that to the host. Repeat this for all the hosts in the cluster until they are all on original version of the VIBs.
- Perform verification steps and testing.


